

Accessibility disclaimer: To obtain information contained in document files on this page in an accessible format please contact the Electron Microscopy Center at (812) 856-1457 or through email at dagmorga@indiana.edu
Setting up an iLab Group Account
Because iLab is tied directly to the IU financial system (aka the Kuali Financial System or KFS), all IU faculty members should be in the iLab system already. This means that PI's should have an iLab account, whether it has ever been used or not. These default iLab accounts should also show each faculty member as the PI of their own iLab group.
Since the PI account is also an iLab user account, the PI can make equipment reservations as a normal iLab user would. The group aspect of this iLab account allows the PI to control various membership and financial aspects for the group. For example, the PI can manage the group account by accepting new members into the group, removing members from the group, or authorizing members to use particular financial accounts. As part of the IU financial system, a PI's external grant accounts (e.g., grants from the National Institutes of Health [NIH] or National Science Foundation [NSF]) should automatically be connected to the group account. In addition, a PI can add internal accounts (e.g., awards from Indiana CTSI) to the group. Once such internal accounts have been added, the PI will need to authorize individual user access to the account(s).
First-time iLab users
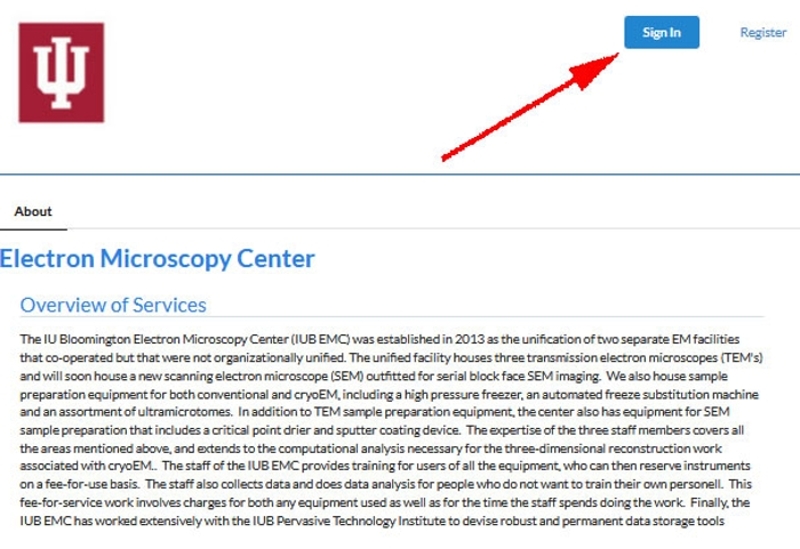
If you have not ever used iLab for anything, you will need to reset your default password: login directly into the EMC iLab home page and click on the Sign-in button in the upper right corner:
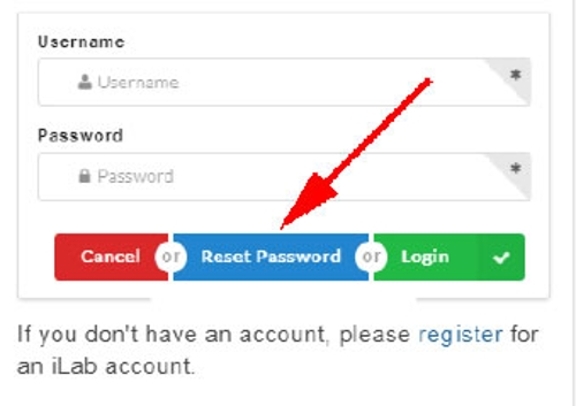
As stated above, all IU faculty should already have an iLab account. This means that all you should need to do is to click on the green login button in the upper right corner. This will allow you to login as a member of the IU community using Duo login. Use your full IU e-mail address (name@iu.edu) and your IU passphrase.
Accessing your iLab group account
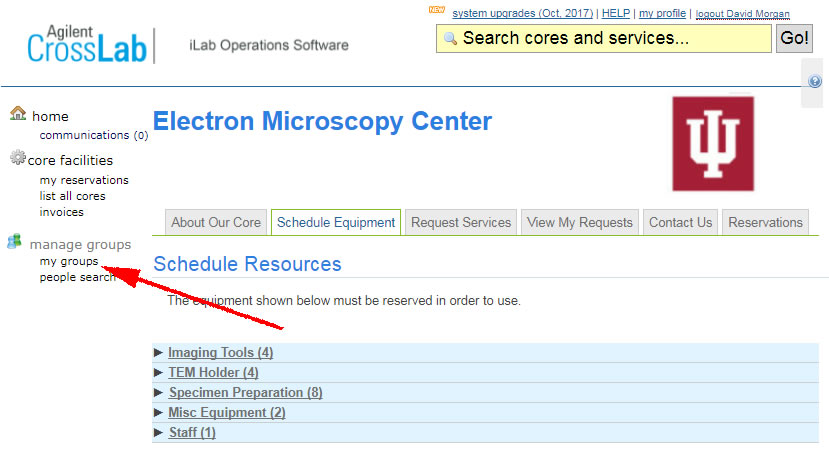
Go to your group home page by clicking the "my groups" link in the "manage groups" area at the left of every iLab page:
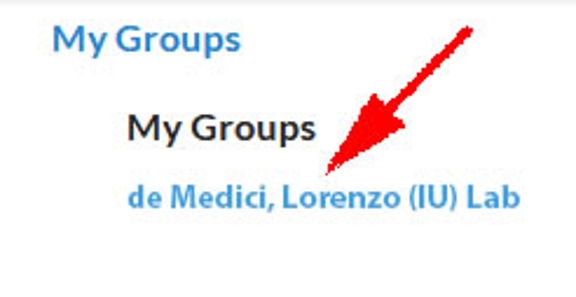
This will take you to a page that lists every group in iLab that you belong to. Most people will only belong to a single iLab group, but is possible to belong to dozens. Private Investigator's (PI's) should automatically have at least one group account in their name. Click on the group you want to modify.
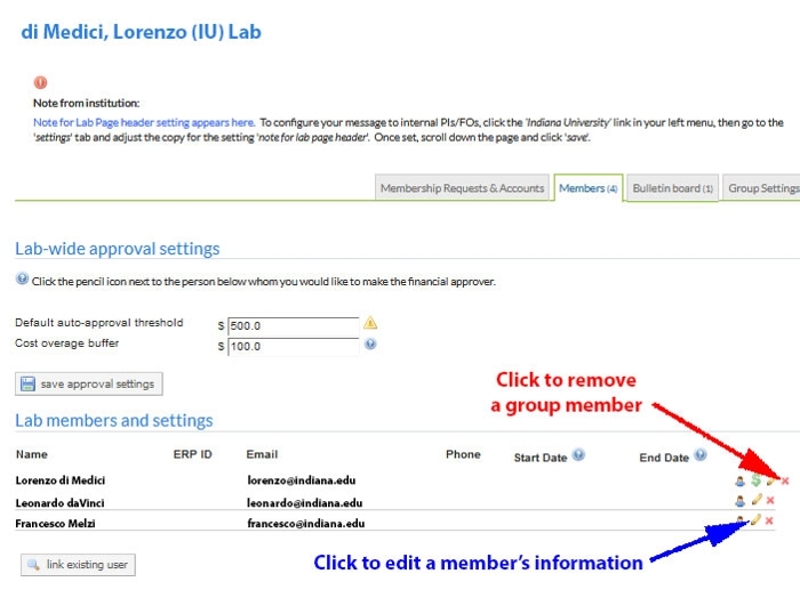
This will take you to the "Members" tab of your group home page:
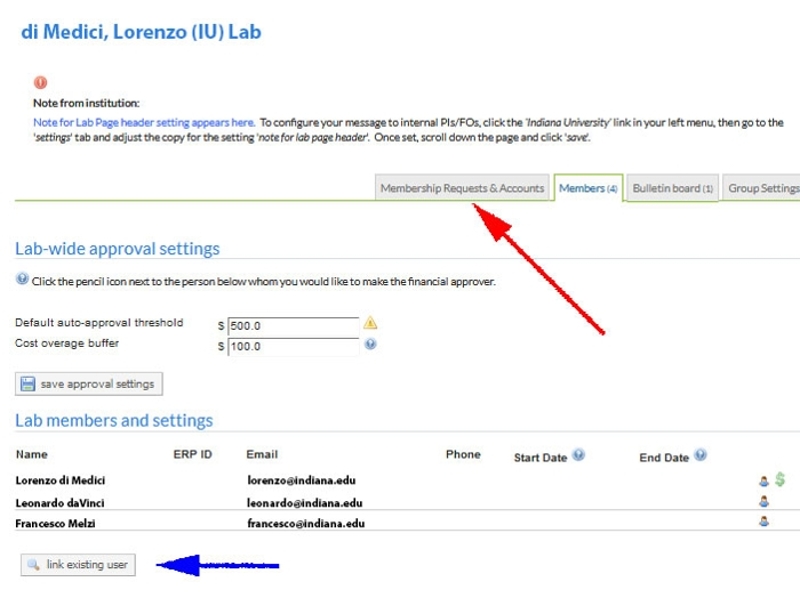
At this point, it is possible to manage people and finances within your iLab group.
Granting a new member access to the group
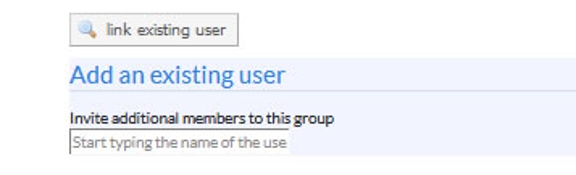
At the bottom of the group account Members tab is a button labeled 'Link Existing User'. Clicking it opens a text box that allows you to search for a new group member by entering the user's name.
If you are unable to find the new group member here, you may need to try another name (e.g., "da Vinci" instead of "daVinci"). It is also possible that the new group member is not yet in the iLab system. In this case, that person will need to register for an iLab user account and you will need to follow the next set of instructions.
Granting a membership request
When a person registers for an iLab user account, the registration procedure asks for the name of the new user's lab. This triggers a request for access to the lab/group when iLab processes the registration. This request then appears in the PI's group page, under the Membership Requests & Accounts tab. The PI will need to approve the request.
Authorizing access to a particular account
After clicking on the group account Membership Request and Accounts tab (the first tab), you should see a page similar to this:
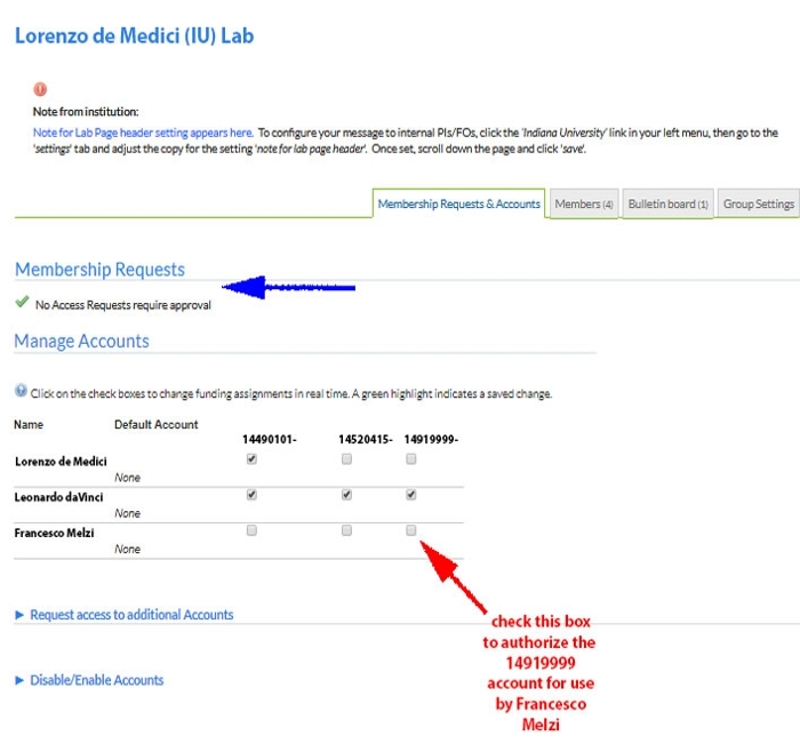
The "Manage Accounts" portion of the page shows a list of group members. Beside each of the names are checkboxes for all the accounts that iLab knows about. Click on a checkbox to authorize (or un-authorize) an individual to use a particular account.
Adding an internal financial account
If for some reason, the account you want to use does not appear on this page, there is another section to the Membership Requests and Accounts page labeled "Request access to additional Accounts" (just below the Manage Accounts area). When you click on that title, a text box will appear:
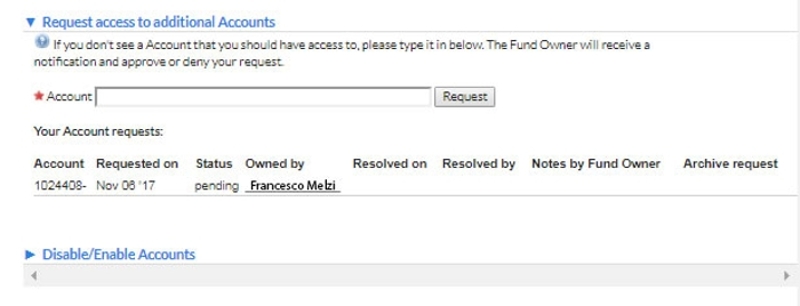
Enter the account you wish to use and click the Request button. The account number must be in this sort of format: "1234567-" (and you will receive an error for the account number if it is not).
Editing a group member
If you need to edit any of the properties beside a group members name, click on the pencil icon (also known as the Edit button) beside a member's name:
This opens the text boxes (shown below) corresponding to e-mail, phone, start/end dates, etc. This action also allows the PI to designate this member as the group financial contact, a lab manager or PI (as opposed to a simple lab member), etc.

Removing a group member
When members leave the group, all that needs to be done is to click on the red X (also known as the Remove Member button) beside a member's name.
If you have any additional questions about using iLab, please contact David Morgan at dagmorga@iu.edu.