

The easiest way to prepare biological samples for electron microscopy is to use any of the widely available heavy metal (negative) stains such as:
Negative Staining Procedures
- uranyl acetete
- uranyl formate
- phosphotungstic acid
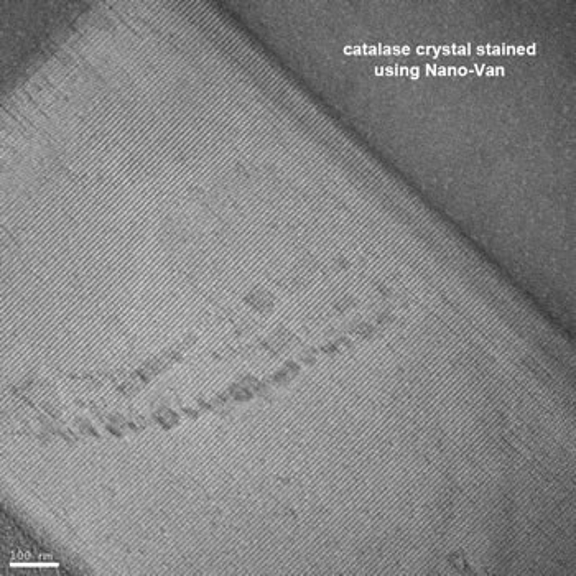
- methylamine vanadate (e.g., Nano-Van)
- methylamine tungstate (e.g., Nano-W)
- ammonium molybdate
Note: Uranyl acetate is probably the most commonly used of these, despite the low pH (~4.3), high osmolarity of commonly used solutions (1 - 2%) and potential damage to samples sensitive to these things.
Many other negative stains have been used with various specimens (usually for rather specific reasons), and it is worth looking through the electron microscopy literature to determine which negative stains (if any) have been used for a given sample.
Negative stains are most commonly used as 1-2% solutions (but see our deep-staining page for the use of ammonium molybdate at higher concentrations). In most cases, the stain solutions should be filtered through a 0.2 μm filter, preferably immediately before use.
All negative stains will limit the resolution of the biological material embedded within the stain layer. The resolution limit imposed by negative stains is reported to be anywhere from 10 to 25 Å, with different stains reported to be "finer-grained" than others (and are reported to be capable of maintaining higher resolution information). One way to think about the resolution limit imposed by negative stains is to recast the problem in terms of Shannon sampling: negative stains coat biological sample as essentially amorphous particles having some average size (reported to be on the order of 5 to 7 Å for stains such as uranyl acetate or phospho-tungstic acid). According to Shannon sampling, the finest feature that can be resolved will be twice the (average) diameter of the stain particle. This thought experiment gives some scientific basis to the belief that fine-grained stains preserve higher resolution information than coarse-grained stains (i.e., twice the diameter of a smaller stain grain will yield higher resolution information), although it is not entirely clear that the different negative stains differ significantly in grain size.
Even under the best conditions, negative staining can produce highly variable results. Attention to the details of repetition (the amounts of sample and stain, the timing of events, etc.) and tricks such as filtering the stain solution immediately before use often help reduce the variability. Probably the most common causes of both the variability from grid to grid and variability across a single grid are differing surface properties of the support film and differences in the thickness of the stain layer that may (or may not) be related to the support film's surface properties.

For this reason, we strongly urge people preparing grids for electron microscopy to pay attention to the surface properties of the support films. Freshly evaporated carbon films are hydrophilic (which is usually good for proteins) and become hydrophobic with age as material from the atomosphere adsorbs to the carbon surface. The hydrophilicity can be restored by procedures such as depositing a thin layer of fresh carbon onto the grids, glow discharging the grids using plasma cleaners and other specially designed devices, exposing the grids to UV light for extended periods of time (10's of minutes), etc. On the other hand, some biological materials will avoid hydrophilic surfaces, and care should be taken to make the support films for such samples as uniformly hydrophobic as possible.
When developing conditions for negatively staining most biological materials, one should always start with freshly glow-discharged grids and only modify the surface properties of the support film when absolutely certain that the hydrophilicity is producing undesirable results.
There are many different methods for preparing samples using negative stains. In the following sections, two fundamentally different methods (and a cornucopia of variations) are presented.
First Method
This method is sometimes referred to as the "single drop method" and involves mixing the stain solution with the sample, either before applying it to the grid or on the grid itself (in situ). A few different ways this method can be implemented are listed here:
- a 1:1 mix of sample and stain is prepared and 5-10 μl is either immediately applied to the grid or the sample is allowed to incubate for a set time and then 5-10 μl is applied to the grid
- apply the sample (3-5 μl) to the grid, wait a set amount of time (usually 5-10 s) and apply 10-20 μl of the stain solution for a set amount of time
- apply the sample (3-5 μl) to the grid, wait a set amount of time (again, usually 5-10 s) and wash the grid by dropping a series of large stain drops onto the grid which is tilted downward
Note: the stain drops are generally produced using a Pasteur pipette. It is also possible to rinse the grid with stain by touching the sample side of the grid to a series of large stain drops on a Parafilm sheet. This accomplishes much the same thing, though the flow of stain across the grid is different in this case (which can be useful or not useful...).
Note 2: it is generally a bad idea to allow negative stains to interact with a solution of a biological sample for longer than ~60 s. Many stains have non-biological pH's, extreme osmolarity or both, and these conditions are bad for most isolated biological materials.
At the end of the staining procedure, the solution that remains on the grid is removed using a piece of filter paper (usually Whatman #1, though some people swear by different types of filter paper). Most of the time, this blotting procedure is "directional" - the edge of the filter paper is touched to the side of the grid and the solution flows across the grid and into the paper. It is also possible to blot by touching the flat surface of the filter paper to the top of the droplet of stain and sample that remains on the grid.
However the blotting is accomplished, all the solution should be removed at this point (i.e., the grid should appear dry after it has been blotted). Allow the grid some amount of time to air dry before it is stored in a grid box or put into the elecron microscope. Please do not insert a freshly prepared negatively stained grid into the JEOL JEM 3200 until is has air-dried for 30-60 minutes (overnight is better). For all of these implementations, it is possible (and potentially useful) to vary things almost infinitely.
For example, one can alter the time during and between steps, the ratio of stain to sample, the blotting process, etc. In general, one should start with the shortest and most simple process and complicate things only when the simple process produces undesired results.
Second Method
This method (sometimes referred to as the "two drop method") eliminates the interaction of bulk sample with bulk stain. It involves applying the sample to the grid, removing excess material and then applying the stain. The fundamental process is:
apply the sample (3-5 μl) to the grid
wait a set amount of time (anywhere from 5-10 s up to many minutes)
blot away the excess sample
apply a 5-10 μl drop of stain to the grid and wait a set amount of time (usually 15-60 s)
blot away the stain and allow the grid to air dry
Note: when allowing the sample to sit on the grid for extended times, it is usually worthwhile both to limit the evaporation of the sample and to prevent airborne particulates from falling onto the grid surface. Half a Petri dish can be used to isolate and/or cover the grid. More extensive methods will need to be applied if and when evaporation becomes a significant issue.
As with the single drop method, a near-infinite number of variations that can be employed: The time the sample or the stain sits can be varied, the blotting process for sample or stain or both can be changed, the amounts of sample or stain can be varied (this usually causes rather minor changes since their bulk phases do not interact when using this method), etc. In addition, more significant alterations can be performed:
- instead of simply blotting away excess sample, it is possible to wash the grid (using buffer, distilled water or even more sample) before blotting using the methods outlined above for rinsing a grid with drops of stain; this is commonly done when too much material sticks to the grid or when what does stick contains large (and un-interesting) aggregates
- similarly, it is also possible before blotting the stain to wash the grid with more stain, distilled water or buffer; this is often useful when the stain interacts with the sample to form large (and again, un-interesting) aggregates; if there are stain/buffer interactions, washing the grid with stain or distilled water will often help
As noted in the section above, one should generally start with the shortest and most simple process and only complicate things when the simple process produces undesired results.
It is also possible to vary the ambient conditions where the negative staining process is performed. For example, although most biological samples behave better when kept at low temperatures, microtubules will usually depolymerize at temperatures lower than "body temperatures" and so staining (and freezing) such samples must be done at elevated temperatures. At the opposite extreme, Salmonella typhimurium polyhooks are highly flexible helical assemblies that can be trapped in an extremely straight form when stained (or frozen) in a cold room (~4° C).
Finally, always keep in mind that negatively staining samples for electron microscopy is a combination of science, art and voodoo! The methods described here are just the tip of the proverbial iceberg, and there are entire books devoted to the intricacies of negative stains!